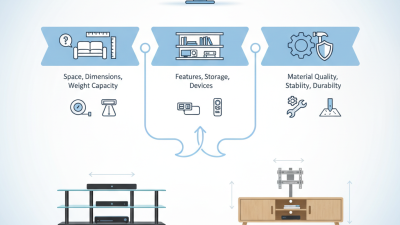
Choosing the right Adjustable Tv Stand in 2026 involves more than matching furniture with a television. It requires careful attention to screen size, viewing height, weight capacity, cable management, and room layout. A stand may look elegant online but feel unstable beside a sofa. Measure twice. Buy once.
This buying guide explains how to compare adjustable height ranges, mounting brackets, base designs, materials, and safety features. It also considers practical details, such as whether a swivel mechanism moves smoothly or stops at useful viewing angles. Wood veneer can create warmth, while steel supports may offer stronger structural confidence. However, product descriptions are not always complete. Check the manufacturer’s specifications, warranty terms, assembly instructions, and independent customer feedback before deciding.
Real homes reveal problems that product photos often hide. A narrow base may tip when children or pets bump the furniture. A glossy surface may show fingerprints under bright lamps. Some cable channels seem helpful but become crowded with streaming devices, game consoles, and soundbars. These small frustrations matter.
The best choice depends on your room, equipment, and habits. Not every expensive model performs better. Some affordable stands provide excellent flexibility, while certain premium designs sacrifice storage for appearance. This guide uses practical comparisons and cautious recommendations to help you make a safer, more informed purchase. Even careful advice has limits. Recheck measurements before ordering.
An adjustable TV stand supports a television while allowing changes in height, viewing angle, or position. Some models use a fixed frame with manual slots. Others include a motorized lift column, rotating plate, or tilting bracket. The correct design depends on room layout, screen weight, and how often adjustments are needed.
Manual stands usually rely on locking pins, screws, or telescoping metal sections. You lift the frame, align the holes, and secure the hardware. Motorized versions use a small electric actuator, gears, and a control switch. When activated, the actuator extends or retracts the column.
Swivel mechanisms often use bearings or a rotating joint, while tilt brackets use pivot points and tension screws. Cable openings should move with the screen, not pull against it.
Check the mounting pattern, load rating, base width, and maximum height before installation. Leave enough cable slack for rotation and height changes. I have found that a stand can feel stable but still wobble on thick carpet. That detail is easy to miss. A level floor helps. Tightening every screw excessively can damage threads or distort the frame. The smoothest mechanism is not always the best choice; a simple manual adjustment may need less maintenance. Test the stand slowly, watch the screen’s balance, and recheck the fasteners after several days of use.
Choosing an adjustable TV stand requires more than checking its appearance. Measure your television’s width, height, and mounting pattern before comparing models. A stand should support the screen’s weight with a clear safety margin. Never rely on appearance alone.
Height adjustment affects viewing comfort. The screen’s center should sit near eye level when you are seated. Check the adjustment range, locking method, and whether changes require tools. A stable base matters, especially on hard floors or around active children. Look for a broad footprint, strong joints, and tested anti-tip features. Small details matter.
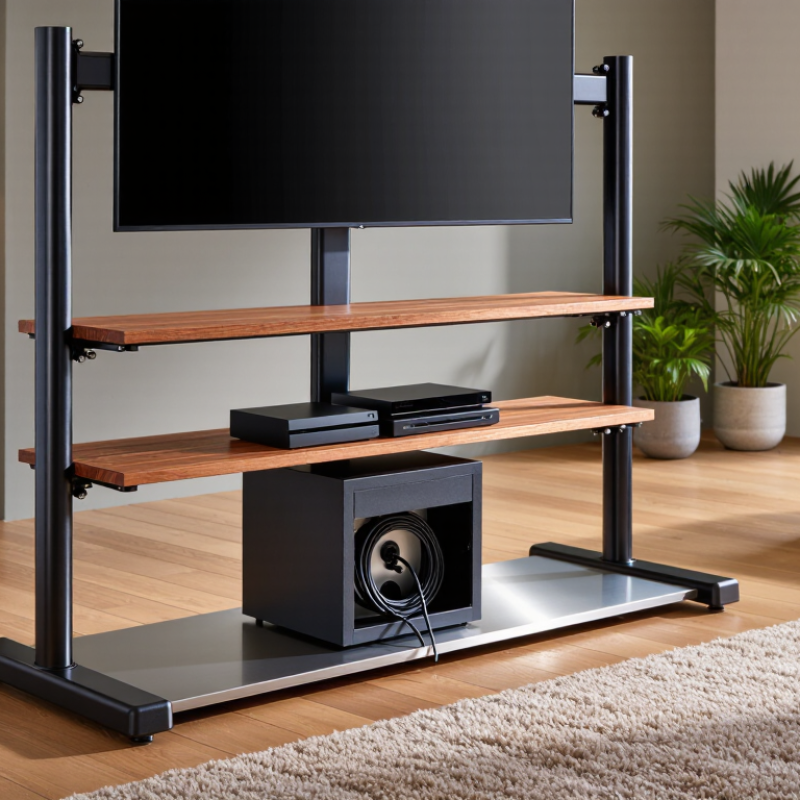
Cable management keeps power and signal wires away from feet and vents. Open shelves should fit your devices without blocking ventilation. Compare the stand’s material, edge finish, and surface resistance against daily use. I once chose a stand with smooth adjustment but ignored its narrow base. It looked elegant, yet felt less secure than expected. That was my mistake. Product specifications should identify weight limits, compatible screen sizes, mounting hardware, and test standards. If those details are missing, ask the seller before purchasing. Adjustable stands are not equally flexible, and maximum height can reduce stability. Check every claim carefully.
Choosing an adjustable TV stand starts with measurements, not appearance. CTA’s 2025 U.S. Consumer Technology Ownership and Market Potential Study reports televisions in about 96% of American households. That widespread use does not make sizing simple. Measure the TV’s full width, depth, and actual weight. The screen size alone can mislead. A 65-inch television may have a narrow base, while another needs a much wider platform.
Match the stand width to the television feet, leaving at least a few centimeters on each side. Check the height after installation. The screen’s center should sit close to seated eye level, reducing neck strain during long viewing. Measure twice. I once placed a screen too high because I trusted the diagonal measurement. It looked impressive, but the viewing angle felt tiring. Adjustable columns help, especially when a soundbar adds height.
Weight capacity must exceed the television, soundbar, console, and decorative items together. I prefer roughly a 25% buffer, although manufacturers may calculate ratings differently. Confirm the VESA pattern, screw size, and rear-panel clearance before buying. OLED models often need careful support around thin panels, while heavier LCD models may demand stronger brackets. Review laboratory testing, load documentation, and return conditions. Market reports can describe size trends, but they cannot replace the model’s technical sheet. Safety margins deserve more attention than attractive finishes.
An adjustable TV stand should be easy to install, but small mistakes can affect stability. Before assembly, check the floor, wall clearance, and stand weight rating. I measure the television’s width and center of gravity, not just its screen size. A level surface matters.
Use the supplied hardware and tighten each fastener gradually. Do not guess. If the stand connects to a wall, locate solid studs or use properly rated anchors. I once tightened one side too early, leaving the frame slightly twisted. Rechecking the level before final tightening would have prevented that error. Test height adjustments slowly, and keep fingers away from moving joints.
Cable management should protect both appearance and function. Leave gentle slack near height-adjustment points, so cables do not pull when the screen moves. Separate power cords from signal cables when practical, and avoid sharp bends behind the panel. Secure loose wires with reusable ties, but never compress them tightly. Keep ventilation openings clear, especially around streaming devices and power adapters.
Stability requires more than a heavy base. Place the stand on a firm, even floor and confirm that every foot touches properly. Attach an anti-tip strap when children, pets, or frequent movement could create risk. The television should remain centered, with no objects hanging from its edge. Test the stand by applying light pressure from several directions. If it rocks, stop using it until the frame, feet, and fasteners are checked again. My installation was nearly finished before I noticed a loose rear bracket. Small inspections still matter.
| Evaluation Area | Buying Dimension | Recommended Specification or Target | How to Check Before Buying or Installing | Safety Consideration |
|---|---|---|---|---|
| TV Compatibility | Screen size and weight capacity | The stand should support the TV's actual weight, with a clear margin below its maximum rated load. The tabletop or mounting column should also accommodate the TV's width and depth. | Check the TV manual or specification label for weight without the original base. Compare it with the stand's stated capacity and platform dimensions. | Never rely on screen size alone; two TVs with the same diagonal size can have different weights, mounting patterns, and center-of-gravity positions. |
| VESA Mounting | Mounting-hole pattern and screw fit | Common VESA patterns include 100 × 100 mm, 200 × 200 mm, 300 × 300 mm, 400 × 200 mm, and 400 × 400 mm. The stand must explicitly support the TV's exact pattern. | Measure the horizontal and vertical distance between the centers of the four mounting holes in millimeters. Confirm the supplied screw diameter and length are approved for the TV. | Do not force a screw or use a screw that is too long; incorrect hardware can damage the TV or fail to secure it properly. |
| Height Adjustment | Viewing height and adjustment range | Choose a range that places the center of the screen near seated eye level. A useful adjustment range is commonly about 100–300 mm, depending on room layout and furniture height. | Measure seated eye height, then measure from the floor or console surface to the TV's screen center after accounting for the TV's dimensions. | Lock every height-adjustment point before releasing the TV. Use all required locking pins, bolts, or safety screws. |
| Swivel and Viewing Angle | Horizontal rotation and tilt | A swivel range of approximately ±15° to ±30° can help with seating arrangements. Tilt should be used only within the stand's stated operating range. | Confirm that the swivel mechanism rotates smoothly without lifting the base, twisting cables, or causing the TV to approach the edge of the furniture. | Keep the center of gravity over the base throughout the adjustment range. Do not use excessive force to rotate the screen. |
| Base Stability | Base footprint, material, and leveling | A wide, rigid base with non-slip contact points is preferable. The base should sit fully on a level, hard surface and remain stable when the screen is turned to either side. | Apply light pressure to the upper corners and check for rocking, sliding, frame flex, loose fasteners, or contact between the TV and nearby objects. | Do not place the stand on an uneven, soft, wet, or unstable surface. Adjust leveling feet if provided. |
| Anti-Tip Protection | Restraint strap or anchoring method | Use a suitable anti-tip strap or tether connected to a structural wall point or an approved furniture anchor. A freestanding stand should not be treated as tip-proof. | Identify a solid anchoring location, verify the supplied hardware is suitable for the wall type, and check that the tether remains attached after adjustment. | Anti-tip restraints are especially important in homes with children or pets. Follow the stand and wall-anchor instructions exactly. |
| Cable Management | Cable channels, openings, and service access | Look for rounded cable openings or enclosed channels with enough space for power, HDMI, Ethernet, optical, and antenna cables without sharp bends. | Route cables with gentle slack for the full swivel and height range. Check that connectors remain accessible and are not pinched by brackets or panels. | Keep power cords away from hot surfaces, sharp metal edges, moving joints, and areas where children or pets can pull them. |
| Electrical Safety | Power strip and ventilation placement | Provide open ventilation around the TV and connected equipment. Use a power strip or surge device only within its rated load and in accordance with local electrical requirements. | Check that vents are unobstructed, plugs are fully inserted, and the power strip is not overloaded with high-power appliances. | Do not conceal damaged cords, daisy-chain power strips, or place liquids on shelves above electrical equipment. |
| Shelves and Storage | Shelf load, clearance, and equipment ventilation | Each shelf should have its own stated load limit. Leave sufficient clearance around receivers, game consoles, and streaming devices for airflow and cable access. | Compare the weight and dimensions of every device with the shelf capacity and usable space, not just the external shelf dimensions. | Place heavier components on lower shelves to reduce the overall center of gravity. Do not exceed any shelf rating. |
| Materials and Finish | Frame rigidity and edge treatment | Prefer a rigid metal or reinforced wood-based frame, corrosion-resistant fasteners, smooth edges, and a finish that resists normal household wear. | Inspect welds, joints, fastener holes, shelf supports, and the underside of the base for bending, cracks, exposed sharp edges, or damaged coating. | Stop assembly if structural parts are bent, cracked, or missing. Do not modify load-bearing components. |
| Installation Process | Tools, assembly sequence, and fastener control | Assembly should include clearly identified parts, compatible hardware, tightening guidance, and a final inspection procedure. Two-person lifting is recommended for larger screens. | Sort hardware before assembly, use the specified tool, tighten bolts evenly, and recheck every joint after the TV is mounted. | Keep the screen face protected during installation. Never lift a large TV by its panel, bezel, or attached stand column. |
| Maintenance | Fastener inspection and cleaning | Inspect the stand periodically and after moving the TV. Tighten loose fasteners only to the manufacturer's specified level. | Check the base, mounting plate, swivel joint, shelf supports, cable openings, and anti-tip tether for wear or loosening. | Unplug equipment before cleaning near electrical connections. Use a soft, slightly damp cloth and avoid abrasive or solvent-based cleaners. |
| Room Fit | Dimensions, clearance, and traffic flow | Allow clearance for swivel movement, ventilation, power access, and cleaning. Keep the base away from door swings, heaters, and high-traffic walkways. | Measure the complete footprint, including shelves, cables, and the widest swivel position. Compare it with the available floor or console area. | Prevent people from catching feet or clothing on the base and avoid placing the TV where it can be struck by doors or furniture. |
| Final Acceptance Test | Stability, movement, and cable check | The assembled stand should remain level, show no visible flex, support the TV without slipping, and allow adjustment without cable tension or connector strain. | Test height, swivel, and tilt slowly; inspect the base after each movement; confirm all cables remain connected and the anti-tip restraint stays secure. | If the stand rocks, tilts unexpectedly, makes unusual noises, or shows any structural movement, remove the load and correct the installation before use. |

Note: Dimensions and capacities should always be verified against the specific TV, stand, fasteners, wall type, and installation instructions. Local electrical and building requirements may also apply.
Choosing an adjustable TV stand in 2026 requires more than checking screen compatibility. I examine the frame, lifting columns, joints, and cable openings by hand. Powder-coated steel usually resists daily knocks, while solid wood adds warmth and weight. Composite panels can work, but inspect edge sealing near floors and cleaning areas. A stand should remain level when the screen rises. Wobble is a warning.
Smart features should solve real problems, not decorate a specification sheet. Look for quiet motors, clear height presets, child-lock controls, and a manual release option. Test the remote from several seats, including a bright room and a dark corner. Some models advertise app control, yet setup may require unstable wireless connections. That can become frustrating. Check power ratings, ventilation, and whether cables bend during movement. I prefer simple controls when privacy policies or software support seem unclear.
Price deserves a five-year view. Compare warranty length, replacement-part access, motor noise, and installation difficulty. A cheaper stand may become expensive after one failed actuator or damaged panel. Measure your wall, floor space, viewing height, and equipment before paying. Keep several inches for airflow. My own evaluations sometimes overvalue sleek finishes; fingerprints and dust quickly expose that mistake. Long-term value means dependable movement, repairable parts, and stable support—not merely a low opening price.